As you can see, the server VM currently has an APIPA address, 169.254.100.231.
To begin setting up the server as a DHCP server, open Server Manager, click "Manage", then "Add Roles and Features."
This dialog, the "Add Roles and Features Wizard", is the main way to add functionality to Windows Server 2016. By default, not much is installed with Windows Server to keep the installed size down and minimize any attack surface that might be unnecessarily exposed by unused services, so if we want to make our server do something new we need to add it here.
This introductory screen describes the purpose of the wizard, and advises you to make sure that your server is currently in a working state before adding or removing roles or features. Make a note of this, then click "Next."
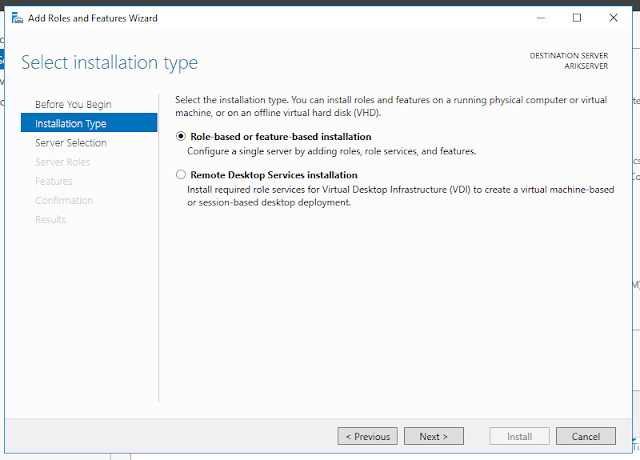
We want to add the DHCP server role to this server, so pick "Role-based or feature-based installation", then click "Next."
Here, you can choose which server you want to add or remove a role/feature on. At the moment, there is only one server, so select it and then click "Next."
Find the "DHCP Server" role in the list, then check its box and click "Next."
The wizard helpfully lets you know that you need to have the Remote Server Administration Tools (RSAT(s)) installed to manage the DHCP server role. You may also install any associated management tools at the same time. If you wish, check the box to install management tools, then click "Add Features."
The next screen allows us to install additional features. Whereas roles are larger, function-oriented installations, features are more fine-grained things like different versions of the .NET Framework or an Internet Printing Client. Right now, we don't need to add any features, as the required ones were already selected by the previous step. Click "Next."
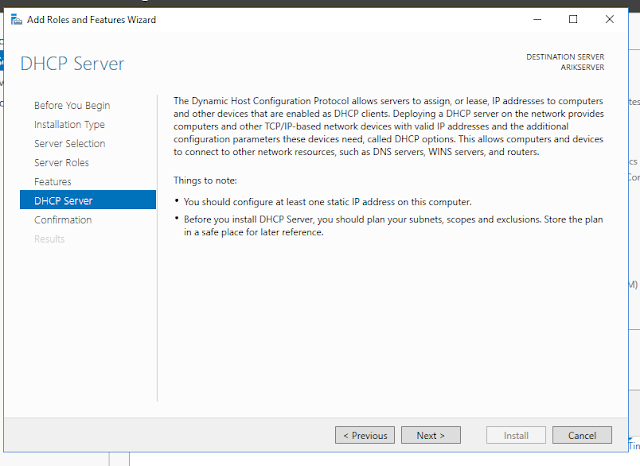
The next screen explains the purpose of the DHCP Server role, and informs us that we should set at least one static IP on the server (as it won't get an address otherwise). Click "Next."
We get a chance to review our choices before installing the roles and/or features selected. If you wish, you can choose to allow the installation to reboot the server if needed. Confirm that everything is as it should be, then click "Install."
Installation proceeds...
... then completes. Now that the DHCP server role is installed, we need to set it up. Click the blue "Complete DHCP configuration" link.
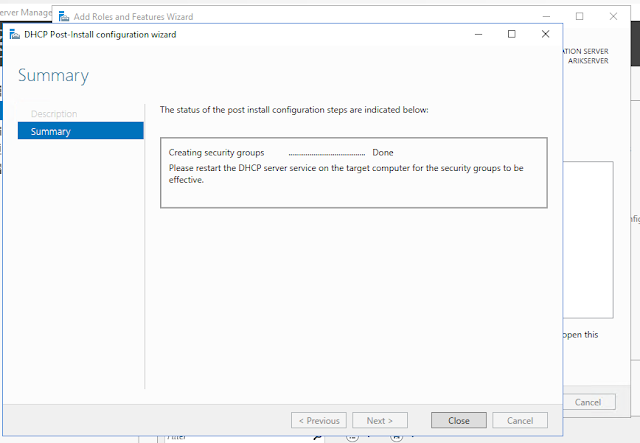
The "DHCP Post-install configuration wizard" dialog lets us know that it will create security groups for DHCP Administrators and Users. Click "Commit."
Once the wizard is finished, click "Close."
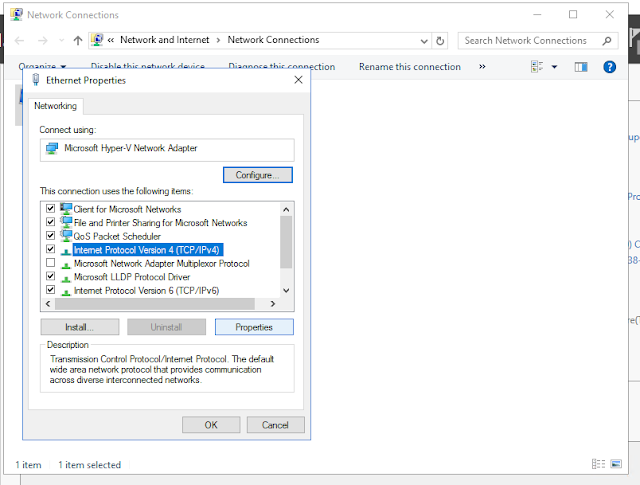
Now that the DHCP server role is installed and configured, we will need to assign our server a static IP. Open the Network and Sharing Center, then view adapter properties. Right-click on the virtual NIC connected to the virtual internal switch, then click "Properties."
Click on "Internet Protocol Version 4 (TCP/IPv4)", then "Properties."
Even though I set up the virtual switch as an "Internal" network, it is possible to set Hyper-V to let the host OS communicate with the VMs, and by this same mechanism to share its internet connection, acting as the gateway for the VM network. Please see this guide for steps on how to set up Windows 10 for this.
This setup, along with my pre-existing home network setup, led me to choose a class C network at 192.168.2.0. My host computer has a static address on this network of 192.168.2.1, so I will set a static IP on the server of 192.168.2.2.
Enter the desired IP, subnet mask, and default gateway for your server, then click "OK."
We will do the same for IPv6. IPv6 has something called a unique local address, analogous to the private IPv4 address we used above. I used an online generator to create this local address, but any within the range fc00::/7 should do. Enter the desired IPv6 address and subnet prefix length, then click "OK."
As you can see in the screenshot below, the newly-assigned static IP is visible in Server Manager.
We're not done yet, though - we still need to define DHCP scopes so that the server knows what IP address ranges it should allocate to clients. In the left-hand pane of Server Manager, click "DHCP."
You will see a list of all of your DHCP servers. Right-click on the server to be configured, then click "DHCP Manager."
Now, the DHCP Manager appears. Right-click on IPv4, then "New Scope..."
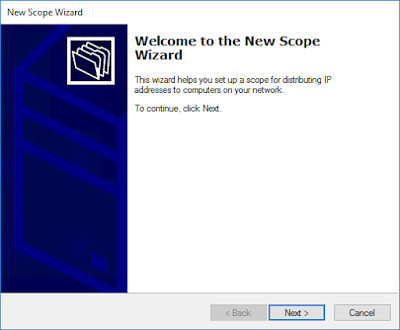
The "New Scope Wizard" appears. Click "Next."
Enter a name and description for the new scope to help you identify it and its uses, then click "Next."
The needs for this network are simple, so I will create one large scope that covers the entire 192.168.2 subnet. Enter the starting and ending addresses for your scope, define the subnet mask (the wizard automatically provides a default value, but you may change it if you wish), then click "Next."
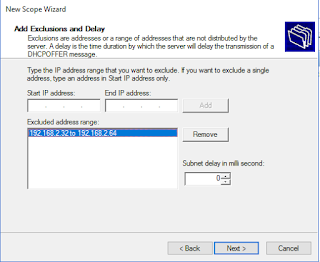
If you wish, you can exclude a range of addresses from the scope, and/or set a delay for DHCPOFFER messages. For the sake of demonstration, I have excluded 192.168.2.32 through 192.168.2.64 from this scope. Add any exclusions you want, and adjust the delay time if you wish, then click "Next."
Next, you can set the DHCP lease length. As this network will be made up of virtual computers that will always be connected to the virtual network, a longer lease time of 7 days should be appropriate enough. Enter your desired DHCP lease length time, then click "Next."
Finally, if you have addresses for the default gateway(s), DNS server(s), and/or WINS server(s) that you want to use for this scope, you can continue on to configure those here. None of these are running at the moment, but I know what the addresses for each will be, so I will go ahead and select "Yes", then click "Next."
The default gateway for this scope will be the host computer, 192.168.2.1. Enter your gateway's IP address, click "Add", then click "Next."
I will be setting up a DNS server on this virtual machine, so I'll use its IP address for this screen. Note that if you already have a DNS server running, you can instead choose to enter that server's name into the "Server name" box, then click "Resolve" to automatically fill in its IP address. Enter your DNS server IP(s), then click "Next."
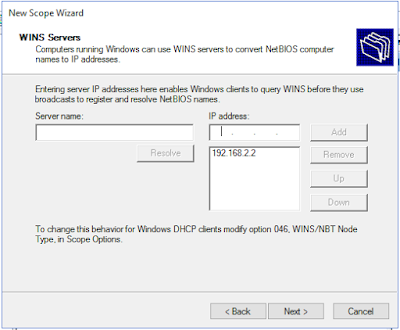
In the same vein, I will be using this server as a WINS server. Enter your WINS server IP (or name, then "Resolve"), then click "Next."
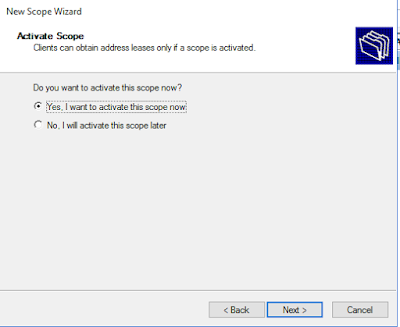
We are now done configuring the scope. If we wish, we can have the wizard activate it for us. Choose whether or not to activate the scope, then click "Next."
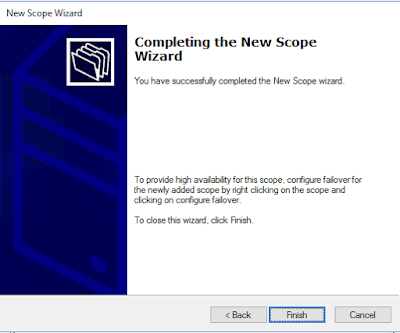
Click "Finish" to end the New Scope Wizard.
Clients connected to the network should now receive IP addresses in the scope we defined. IPv6 scope definition is similar, so I have not reproduced the steps here.













No comments:
Post a Comment